
Photographing Prints and Paintings

Artists and designers need high quality documentation of their prints and paintings for print portfolios, websites, graduate school applications, and for museum and gallery record keeping. If you carefully follow this guide and take the necessary time, you’ll get great photographs of your work.
tools: digital camera (not a point and shoot), tripod, thumb tacks, tape, 2 lights, tape measure, small level, Photoshop or other image retouching software.
SET-UP
The camera must be squared up to the picture.
1. Secure your painting or print flat against a wall 3 or 4 feet up from the floor away from any windows or unwanted light. Use thumbtacks or tape for prints. A table pushed against the wall will provide a ledge to set a painting on. Straighten the print/painting on the wall. Use a level. (a)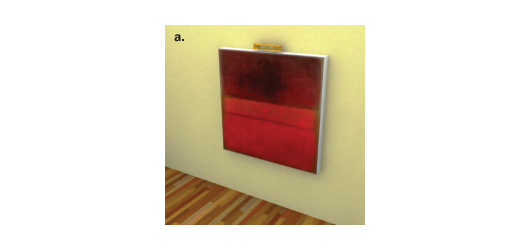
2. Find the center of the picture and measure its distance from the floor. An easy way to find the center of a rectangle is to run strings from each corner across the middle. X marks the spot. (b)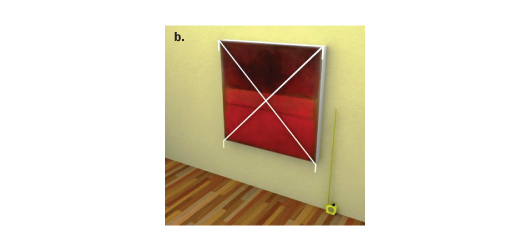
3. Secure the camera to the tripod and spread the legs out evenly. Straighten up the camera (front to back, side to side). Raise or lower the center column of the tripod until the center of the lens is the same height as the center of the picture. Tighten the tripod down. Use the tape measure (best) or, put the camera/tripod right in front of the print/painting and position the camera by eye. Next, position the camera in the center of the picture side-to-side. (c)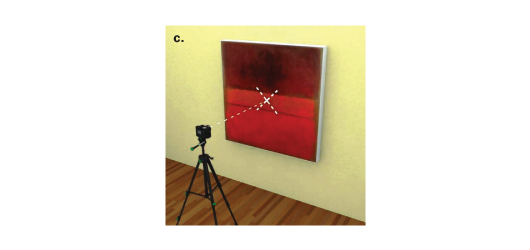
4. Back the camera several feet away so that it won’t cast a shadow on the picture but you can still fill the viewfinder with the picture. If there are tile or floorboard lines on the floor, use them to stay squared up to the picture. (d)
5. Frame the picture neatly in the viewfinder with the center of the viewfinder placed in the exact center of the picture. Leave a little space around the outside of the picture. Move the camera on the tripod head to do this but don’t change the height. If it looks crooked either the camera is not squared up with the picture and, or, the picture is crooked on the wall. A level is useful here. (e) 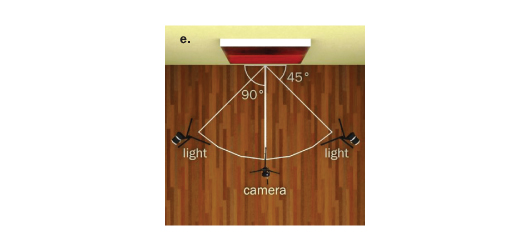
THINGS TO AVOID: Wide-angle setting on lens.
LIGHT
The light must be perfectly even across the surface of the picture.
1. Natural light: If you’re in a space filled with natural light with no direct sunlight on the picture, you may have the even lighting required. Some people like to do this outside on a high overcast day. Great light but very hard to square the camera to the picture surface without the benefit of a wall and a floor.
2. Artificial light: If you don’t have the above, get 2 lights of equal strength (reflectors with clamps from the hardware store, studio lights on stands, etc.) Position the lights at the same height as the camera and center of the picture. Back them several feet away on either side of the picture at 45-degree angle, aimed at the picture. Be sure the lights are an equal distance away from the print/painting.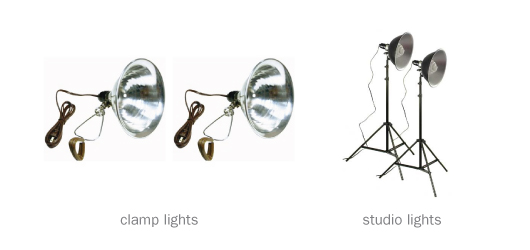
3. Check carefully for evenness. Swivel the lights back and forth to eliminate hotspots. Try backing the lights further away to soften and even the light. Since the camera is on a tripod you can use longer exposures so don’t worry about the amount of light on the print/painting, just the evenness.
4. If highlights are showing up, try moving both lights a little further to the sides. A broader angle will also emphasize any surface texture for better or worse. Check the evenness of the lighting again- it’s harder to maintain as the lights move to the side. Tweak the lights until the light is even across the surface of the print. You can check this with a handheld meter or simply look very carefully at the light as you adjust it. Take your time.
THINGS TO AVOID: flood lights (hot spots), strobe lights unless you know how to use them
CAPTURE
You can successfully correct minor problems in the pictures in Photoshop or other retouching software…but if you don’t get it 95% right “in the camera” you won’t get the quality result you need.
1. Check focus and make a series of exposures until you find one that looks right in the camera. Save the lighter and darker exposures on either side of the good one to be sure you’ve got it. Use “raw” setting if you want to make prints or if you are only going to use the image for web or on the computer, use “jpg.” Use a higher resolution (300dpi or more). You can lower it later.
POST PRODUCTION:
- Crop, adjust contrast, brightness, re-touch any dust or flaws.
- Go to the next picture and repeat all of the above steps.
- If you’re shooting a series of the same size images you can simply trade out the pictures and keep your set up the same.
THINGS TO AVOID:
- Lens flare (when the camera lens catches a bit of light from your lighting set-up it degrades the image). Use a lens shade and reflector lights that “aim” the light toward the picture.
- Glass.